🕓 Last updated: February 26, 2026
Color-Coordinated Balloon Garland Along the Staircase
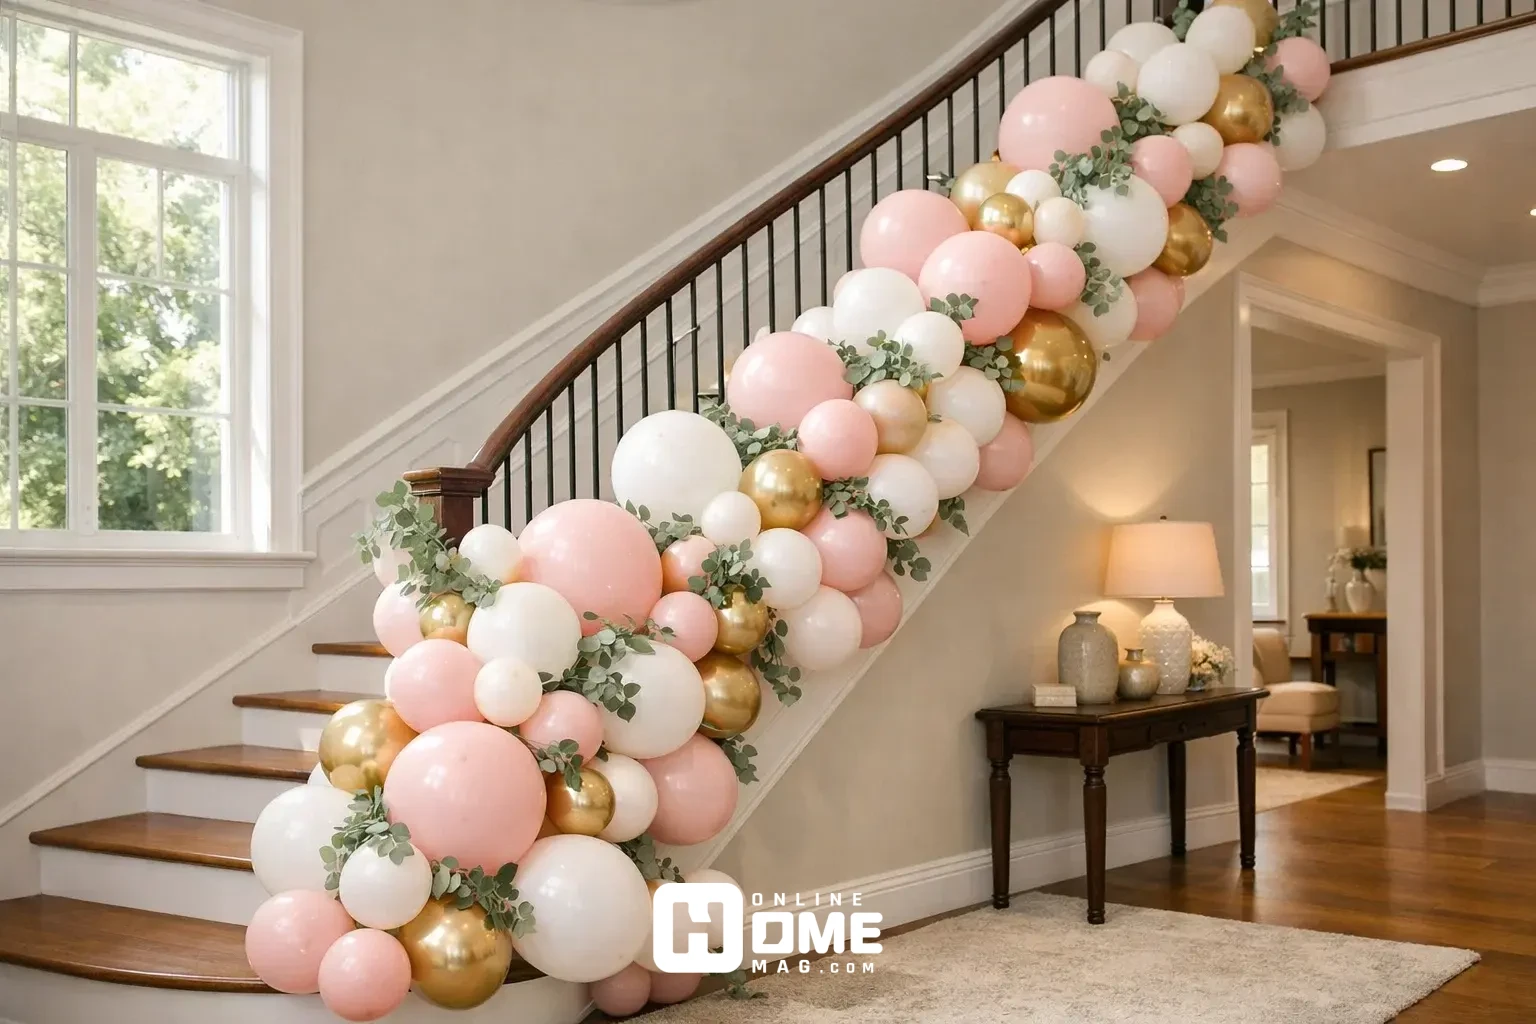
Transform your staircase into a stunning focal point with a color-coordinated balloon garland. Choose three complementary colors that match your party them for example, blush pink, gold, and white for an elegant look, or navy, silver, and light blue for a sophisticated vibe. You’ll need approximately 50-60 balloons in various sizes (5-inch, 11-inch, and 16-inch diameters) to create a 6-8 feet garland.
Start by inflating balloons to different sizes to add dimension. Use balloon tape or fishing line as your base, threading balloons through and securing them in clusters. Attach the garland to your staircase railing using clear command hooks or twine, spacing them every 12-15 inches. Create organic movement by allowing some balloons to cascade down while others bunch together. Add greenery sprigs or fresh eucalyptus between balloon clusters for a natural, upscale touch. The entire process takes about 45 minutes and costs under $25, yet delivers a designer look that serves as both decoration and a perfect photo backdrop.
Simple balloon decoration ideas at home Using the Ceiling Grid Method
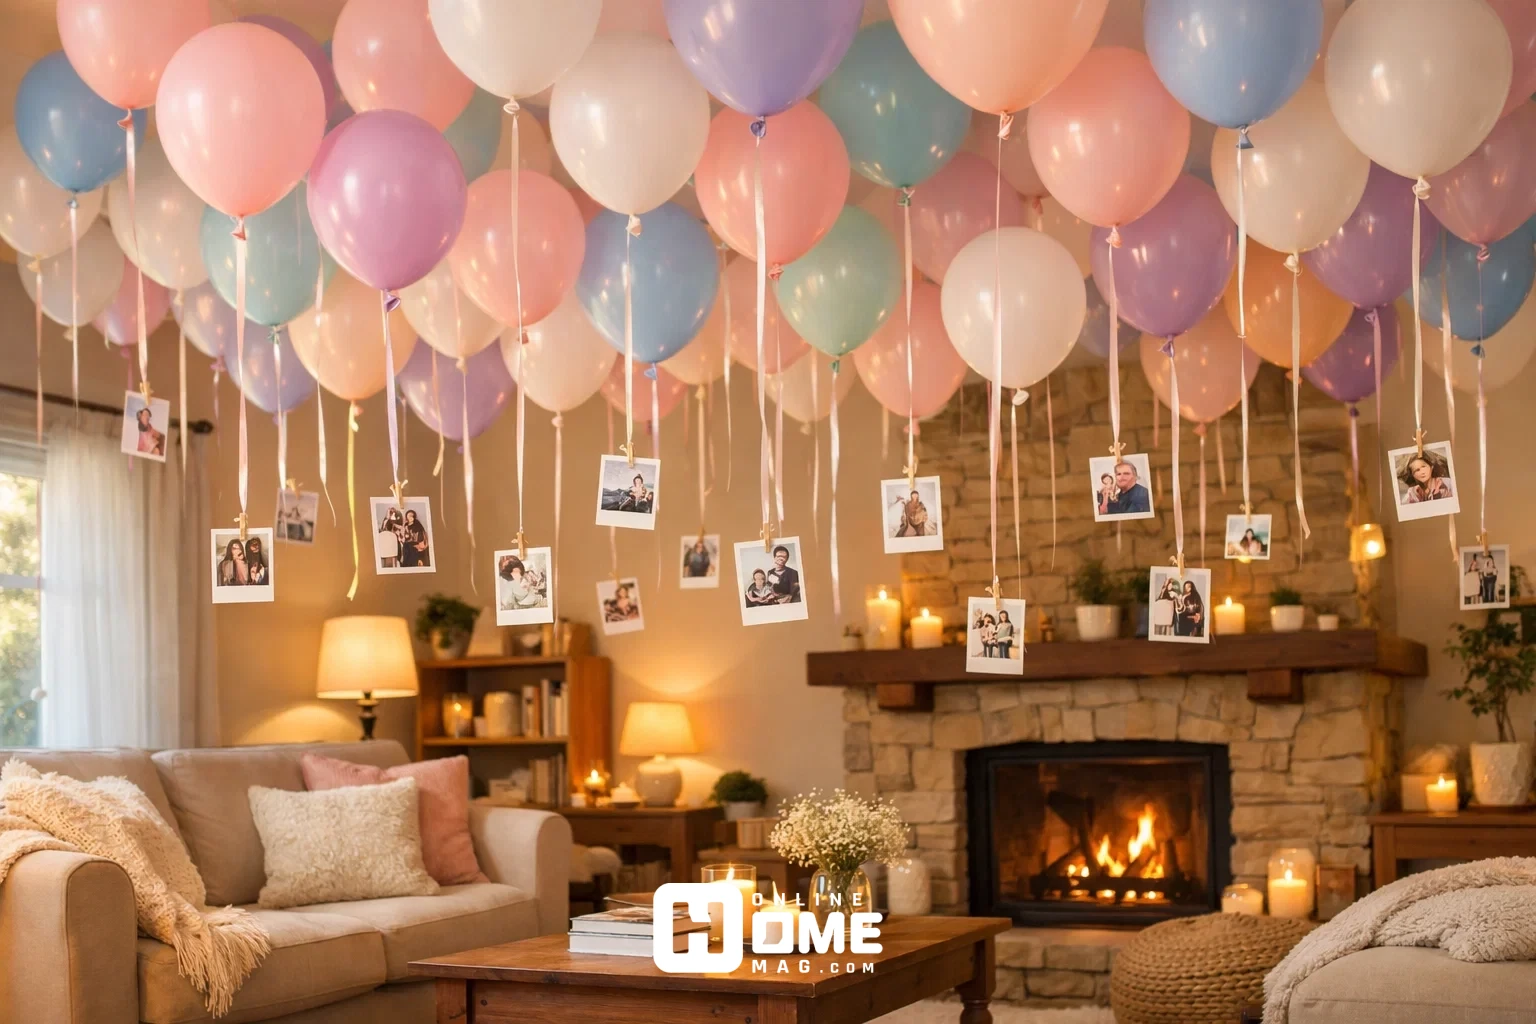
Create a floating balloon ceiling installation that adds whimsy without floor clutter. Purchase 30-40 helium filled balloons in your chosen color palette and attach 3-4 feet ribbons in varying lengths to each one. As guests arrive, release these balloons to float at different heights across your ceiling, creating a cascading cloud effect. Position most balloons over the main party area whether that’s your dining table or living room seating.
To add a personalized twist, tie small printed photos or birthday wishes to some ribbon ends, so they dangle at eye level. This simple birthday decoration at home with balloons requires minimal setup time (about 20 minutes) and creates maximum visual impact. Calculate one balloon per square foot of ceiling space for optimal coverage. Use double-sided tape to secure some ribbons to walls at strategic points, preventing balloons from drifting into unwanted areas while maintaining the floating illusion.
DIY Photo Memory Wall with String Lights
Create an intimate gallery wall celebrating the birthday person’s journey through life. You’ll need 15-20 printed photos (4×6 inch size works perfectly), 20 feet of twine or decorative string, small wooden clothespins, and battery operated fairy lights. Measure a blank wall space approximately 6 feet wide by 4 feet tall. Attach the twine horizontally across the wall in 3-4 parallel lines, spacing them 12 inches apart, using small nails or removable adhesive hooks at each end.
Clip photos to the strings using wooden clothespins, arranging them chronologically or by theme. Weave warm white fairy lights through the strings, ensuring the battery pack is hidden behind a photo or tucked at the edge. This creates a warm glow that highlights memories beautifully, especially during evening celebrations. Add handwritten notes or achievement cards between photos for extra personality. The entire setup costs approximately $30 and takes 60 minutes to arrange, but becomes a conversation starter that guests will admire throughout the party.
This decoration technique naturally transitions into creating themed spaces within your home, which brings us to another accessible idea that requires minimal investment but delivers significant visual appeal.
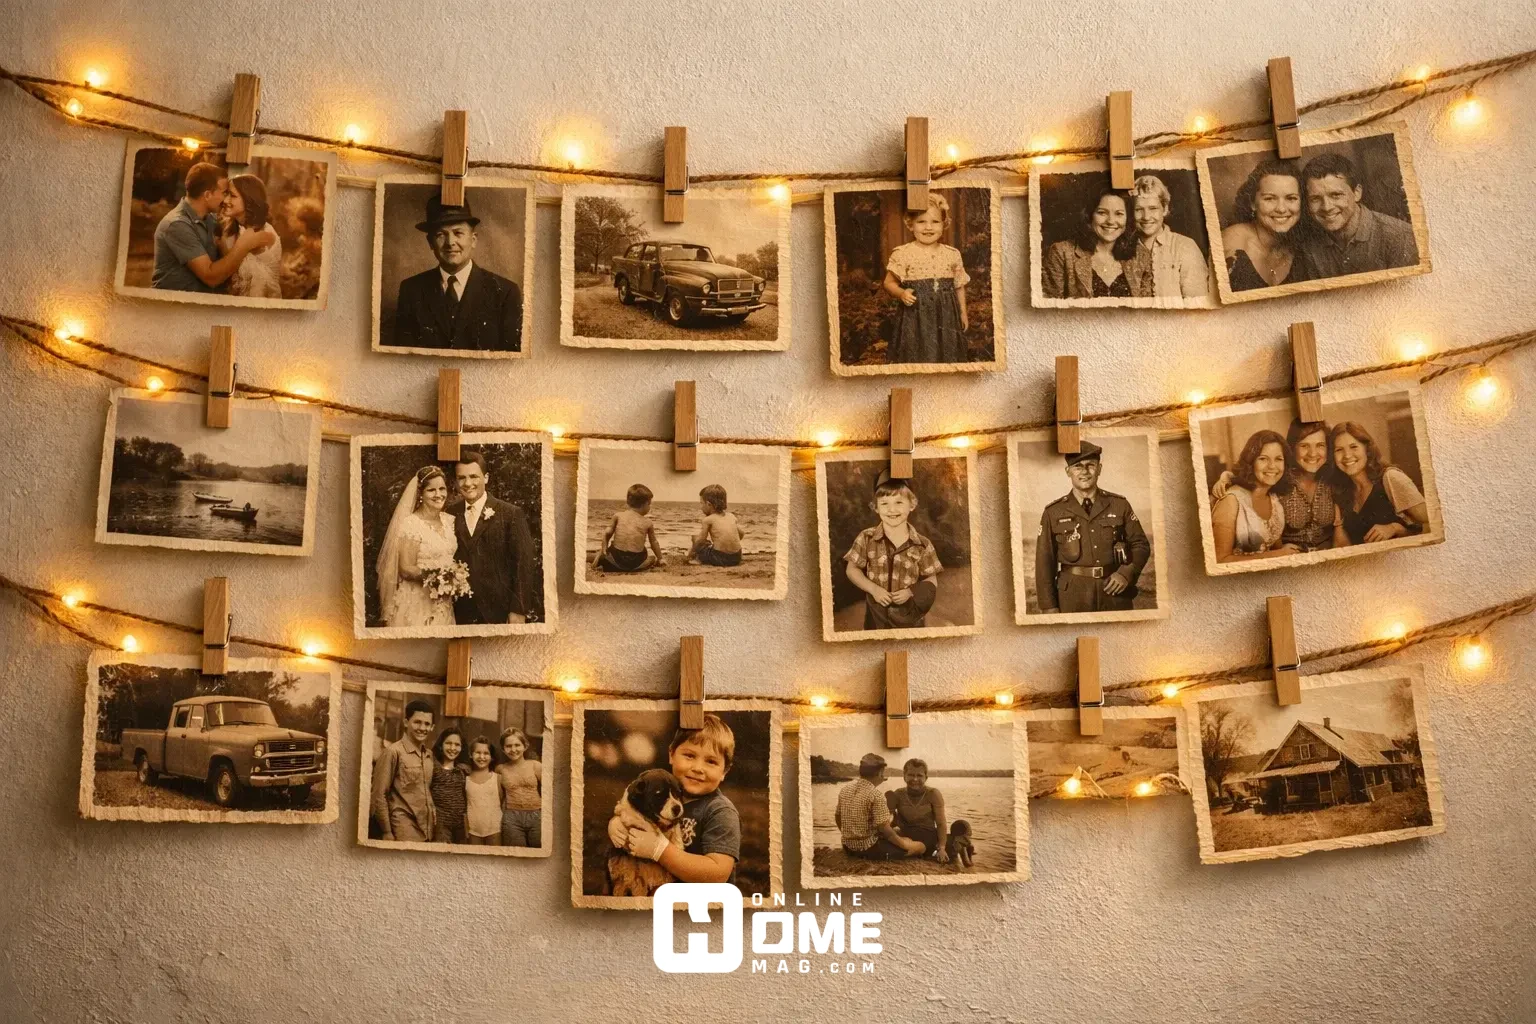
Table scaping with Everyday Items Elevated
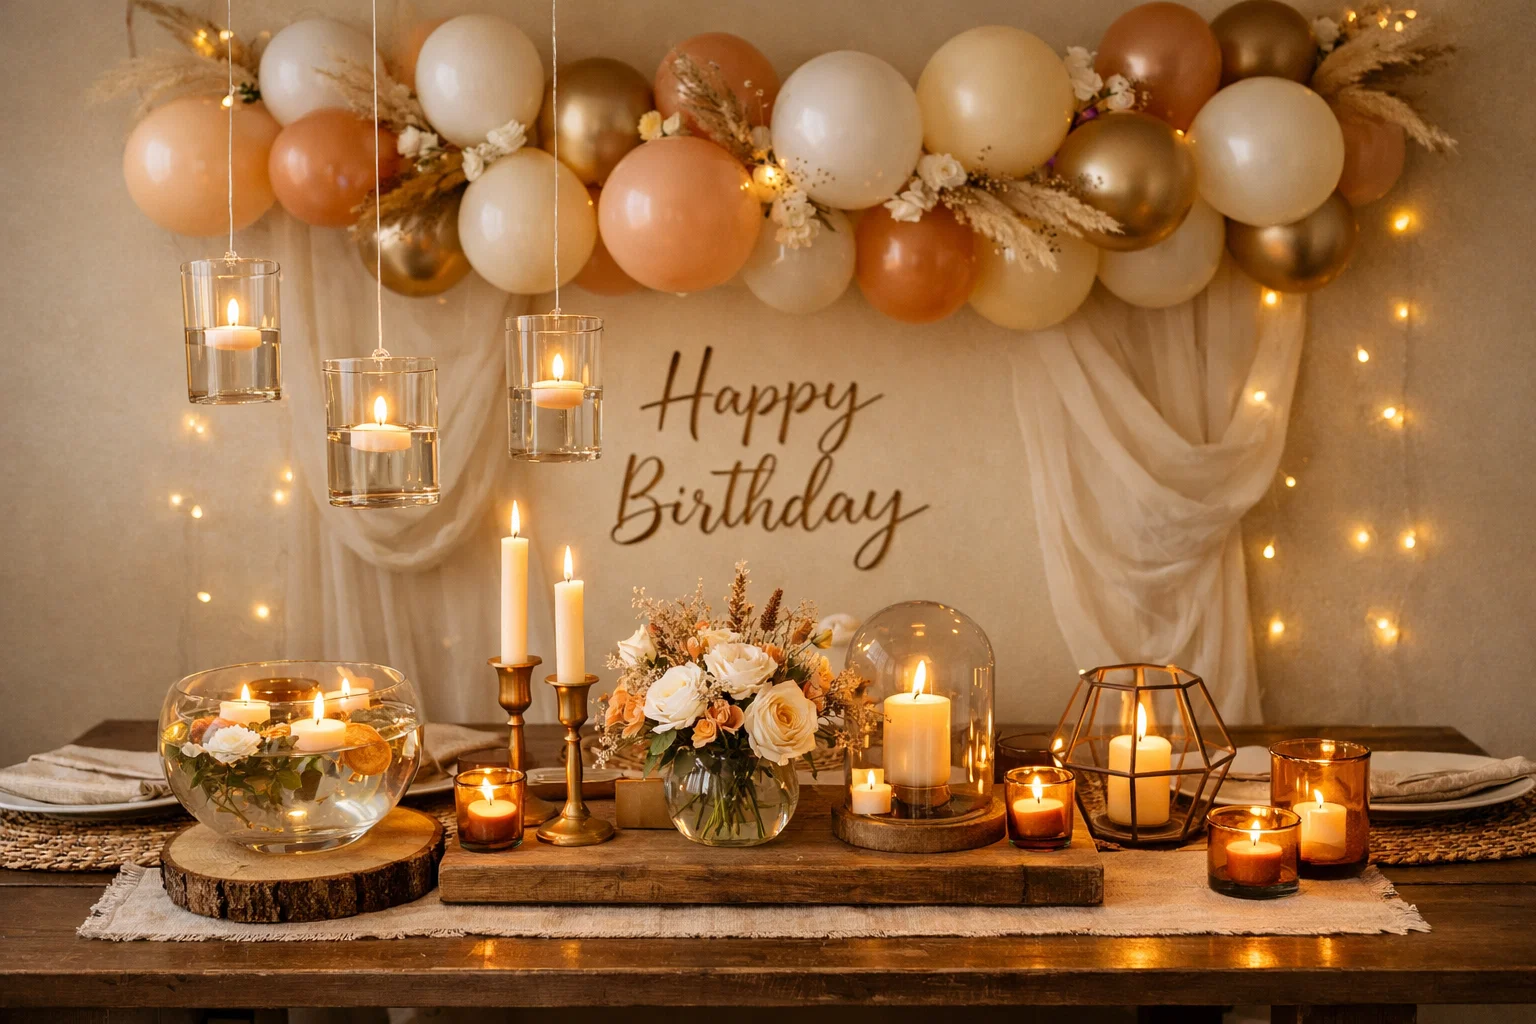
Transform your dining or dessert table into a showpiece using items you already own. Start with a solid-colored tablecloth as your foundation white, cream, or a bold jewel tone works well. Layer a table runner down the center using fabric remnants, a scarf, or even kraft paper for a rustic feel (approximately 12-14 inches wide for a standard 30-inch wide table). Create height variation using cake stands, overturned bowls, or stacked books covered with cloth.
Arrange three height levels: low (direct on table), medium (4-6 inches), and tall (10-12 inches). Scatter votive candles or LED tea lights across the table aim for 8-10 pieces for a 6-foot table. Fill glass jars or vases with fresh flowers, branches, or even colorful candy. Add personal touches like framed photos at each place setting or hand lettered name cards. This simple decoration for birthday party at home costs under $20 if you shop smart and raid your cabinets strategically, yet achieves the curated look of professional event styling.
Paper Fan Backdrop Installation
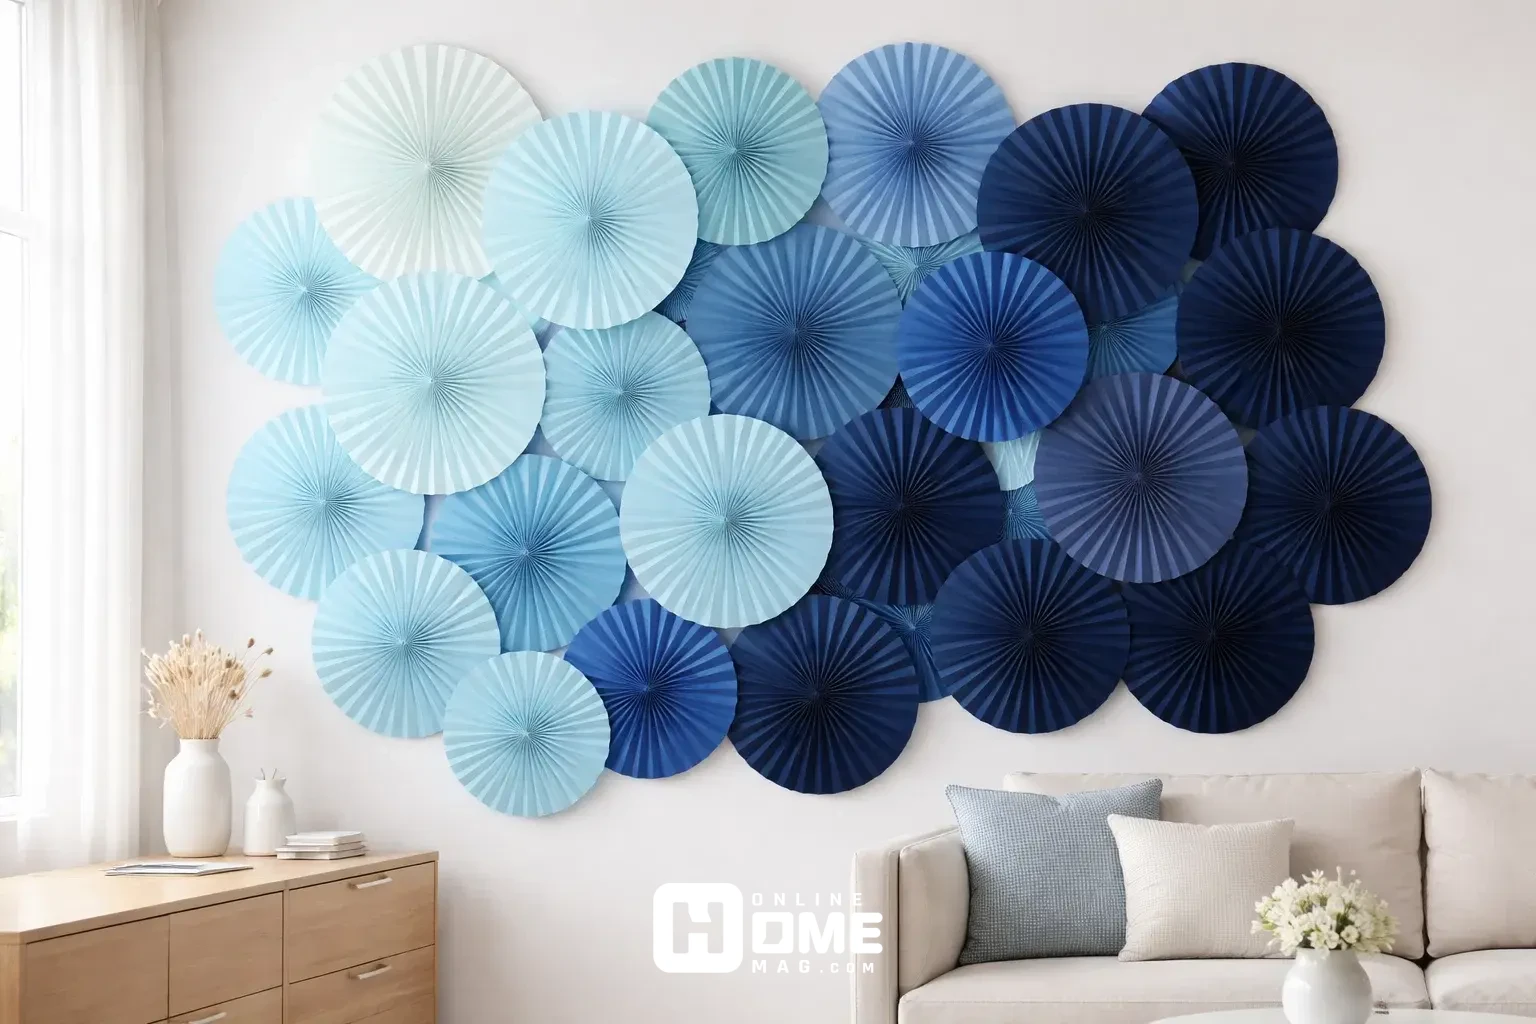
Create a dramatic focal point using paper fans arranged in a geometric pattern. Purchase 12-15 paper fans in graduated sizes (8-inch, 12-inch, and 16-inch diameters) in coordinating colors. Choose a wall space approximately 8 feet wide by 6 feet tall, ideally behind where the birthday person will sit or stand for photos. Start by opening and securing each fan with the provided fasteners.
Arrange them on the floor first to plan your pattern consider a gradient from light to dark, or alternating colors in a checkerboard style. Use 1-inch spacing between fans for a full, lush appearance. Attach fans to the wall using removable adhesive strips or pushpins, working from the center outward. Position larger fans in the center and smaller ones toward the edges to create depth. The entire installation takes 30-40 minutes and costs $15-25, but photographs beautifully and can be reused for future celebrations. This backdrop works particularly well for simple 18th birthday party ideas at home as it provides an Instagram-worthy photo opportunity.
Confetti-Filled Clear Balloons as Table Centerpieces
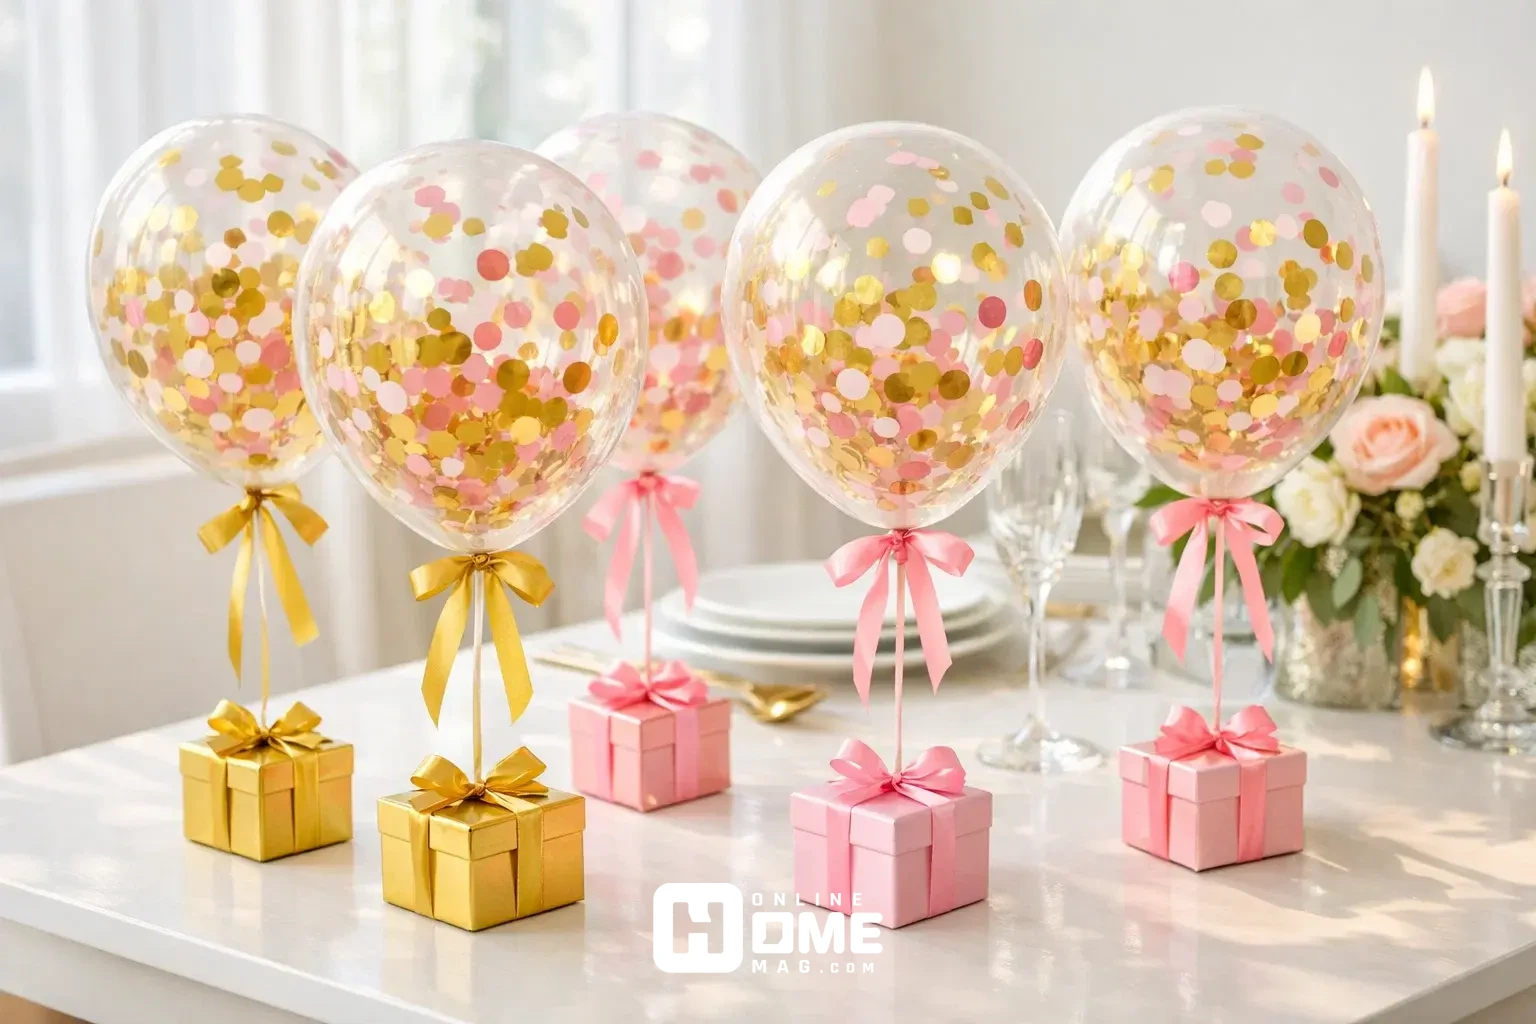
Elevate standard balloon decorations by creating confetti filled transparent balloons as stunning centerpieces. You’ll need 5-7 clear latex balloons (16-inch diameter), metallic or tissue paper confetti in your color scheme, and balloon weights. Before inflating, use a funnel to add 2-3 tablespoons of confetti into each balloon. Inflate balloons with air (not helium) to approximately 14 inches, leaving them slightly under inflated for better confetti distribution. Rub the inflated balloon against fabric or your hair to create static, which makes the confetti stick to the balloon’s interior walls for better visibility.
Attach ribbons in complementary colors (30-36 inches long) and secure each balloon to a decorative weight consider using small gift boxes, potted plants, or painted rocks. Place one centerpiece per table or cluster 2-3 together for your main dining area. This birthday decoration at home simple approach costs about $12 for materials but delivers a custom, party-store quality look. The confetti adds movement and sparkle without the mess of loose confetti on surfaces.
The beauty of confetti balloons lies in their versatility they work for any age celebration and can be customized with different confetti colors and shapes to match any theme, including approaches used in Kids Birthday Home Decoration Ideas that appeal to younger guests while maintaining sophistication.
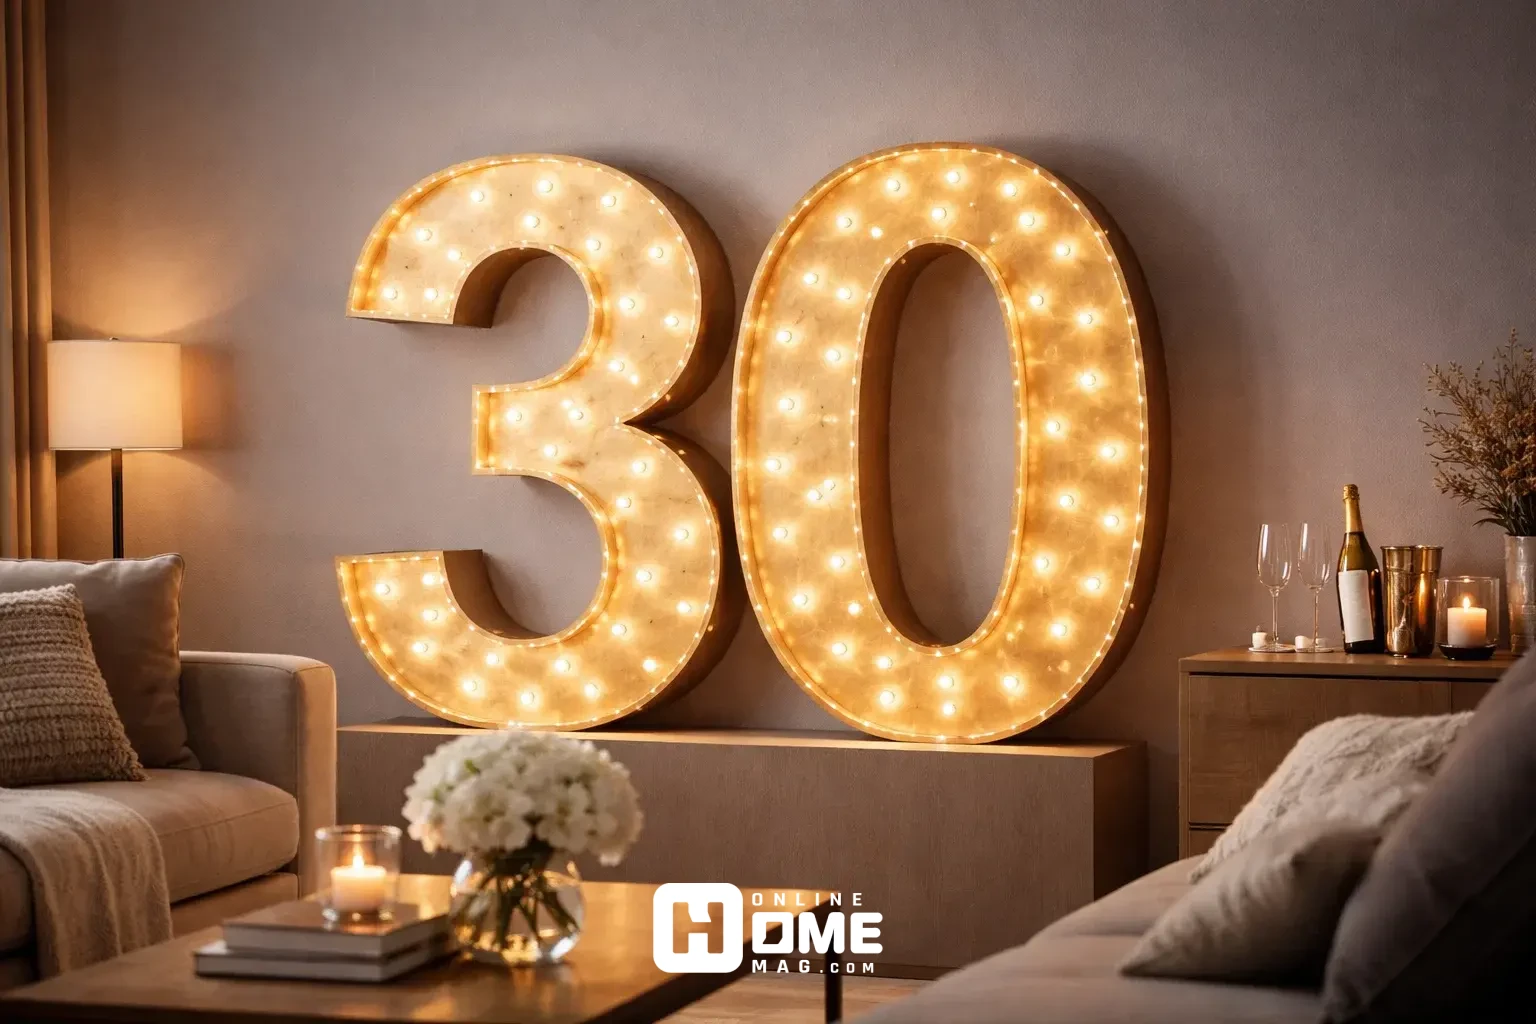
Number Marquee Display Using String Lights
Create a personalized age display that serves as both decoration and lighting element. Purchase or craft the birthday number from cardboard trace a template approximately 24 inches tall and cut two identical numbers for stability. Cover the numbers with aluminum foil, gold spray paint, or decorative paper. Wrap LED string lights (battery-operated, warm white or colored) around the number structure, securing with clear tape on the backside every 4-5 inches.
Use approximately 15-20 feet of lights for adequate coverage on a 24-inch number. Mount the completed marquee on a wall using command strips, or create a freestanding display by attaching a cardboard base. Position this near the entrance or above the gift table for maximum visibility. For birthday easy decoration at home, this DIY project requires about 90 minutes and costs $18-22, but becomes a memorable focal point that the birthday person will want to keep afterward as room decor.
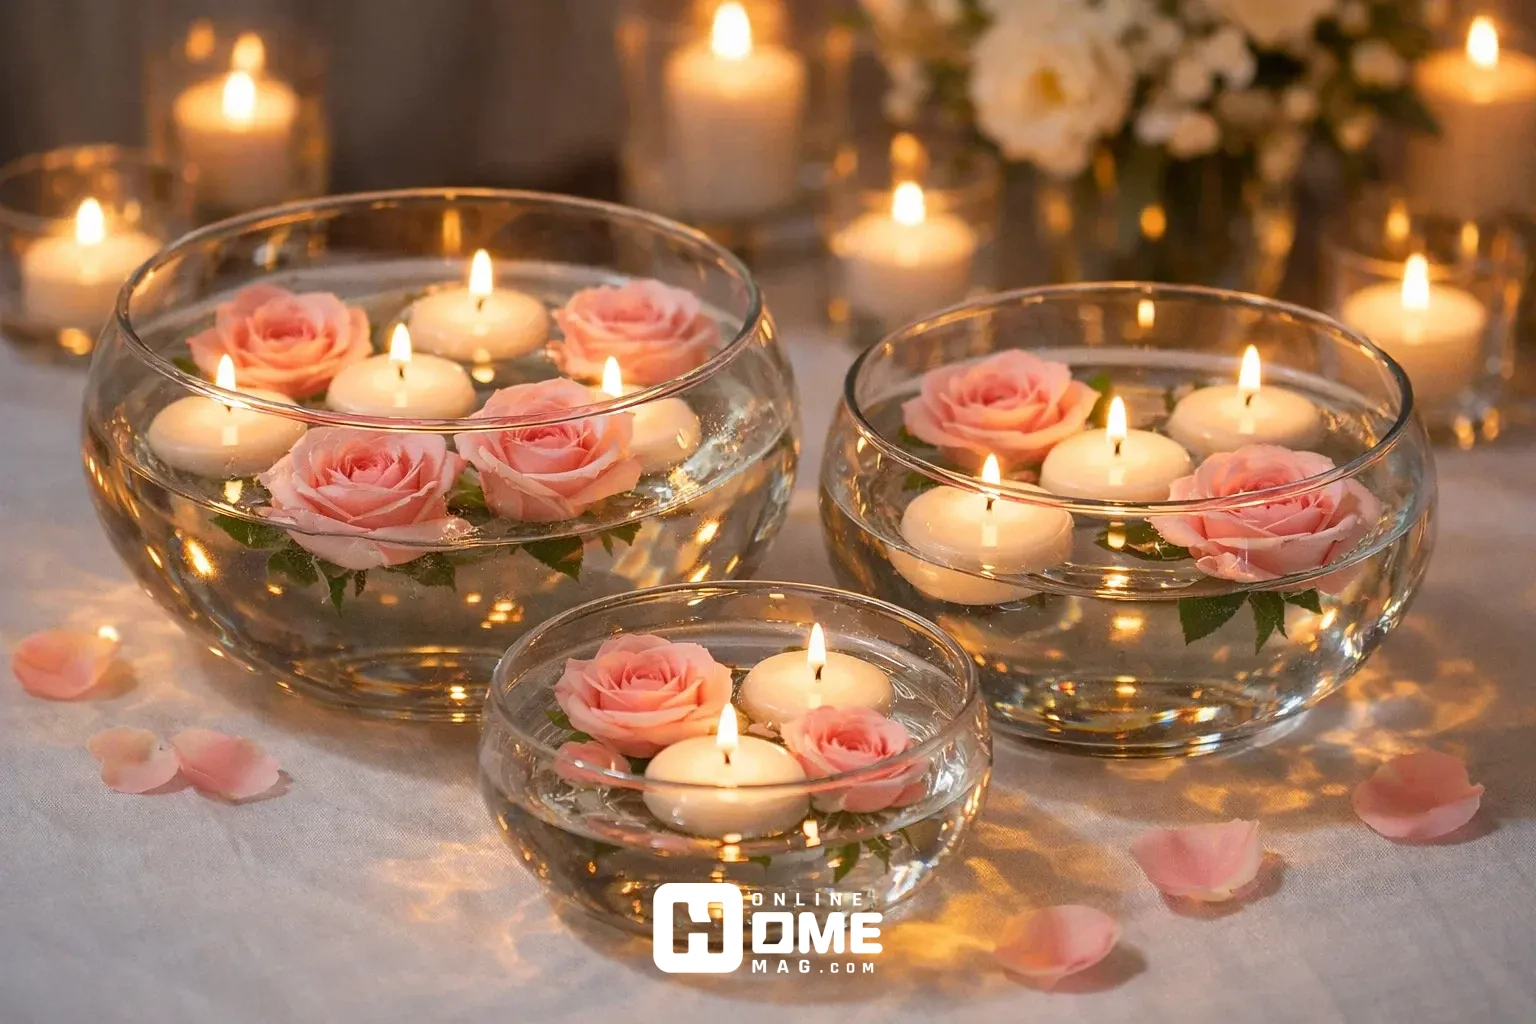
Floating Flower and Candle Centerpiece
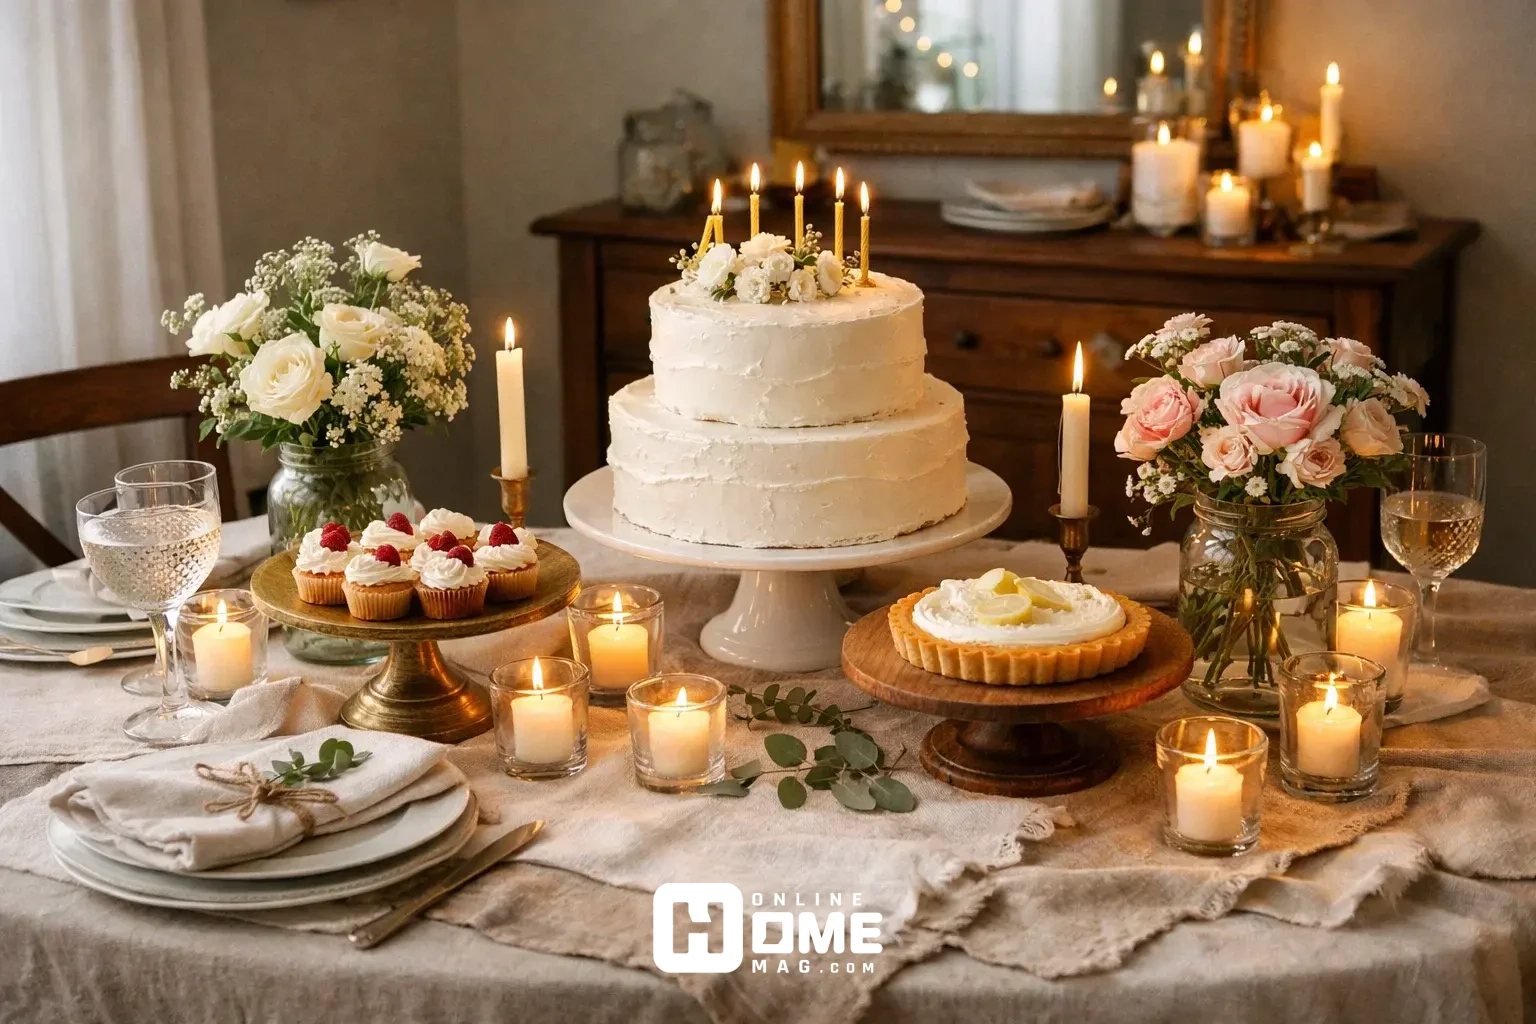
Transform simple glass bowls into elegant centerpieces with floating flowers and candles. Gather 3-5 clear glass bowls in varying sizes (8-12 inch diameter), fresh or silk flower heads, and floating candles. Fill each bowl with water to within one inch of the rim. For a 10-inch bowl, use 3-4 flower heads roses, carnations, or gerbera daisies work beautifully. Trim stems to allow flowers to float freely. Place 2-3 floating candles among the flowers, ensuring proper spacing for safe burning.
Add a few drops of food coloring to tint water if desired, or leave clear for classic elegance. Arrange bowls at different heights on your table using books or boxes underneath a tablecloth. Scatter loose petals around the base of bowls for cohesion. This technique, often seen in Simple Wedding Decorations at Home, translates beautifully for birthdays and costs approximately $20-30 depending on flower choice. The gentle movement of flowers and flickering candlelight creates an intimate, upscale atmosphere perfect for adult birthday celebrations.
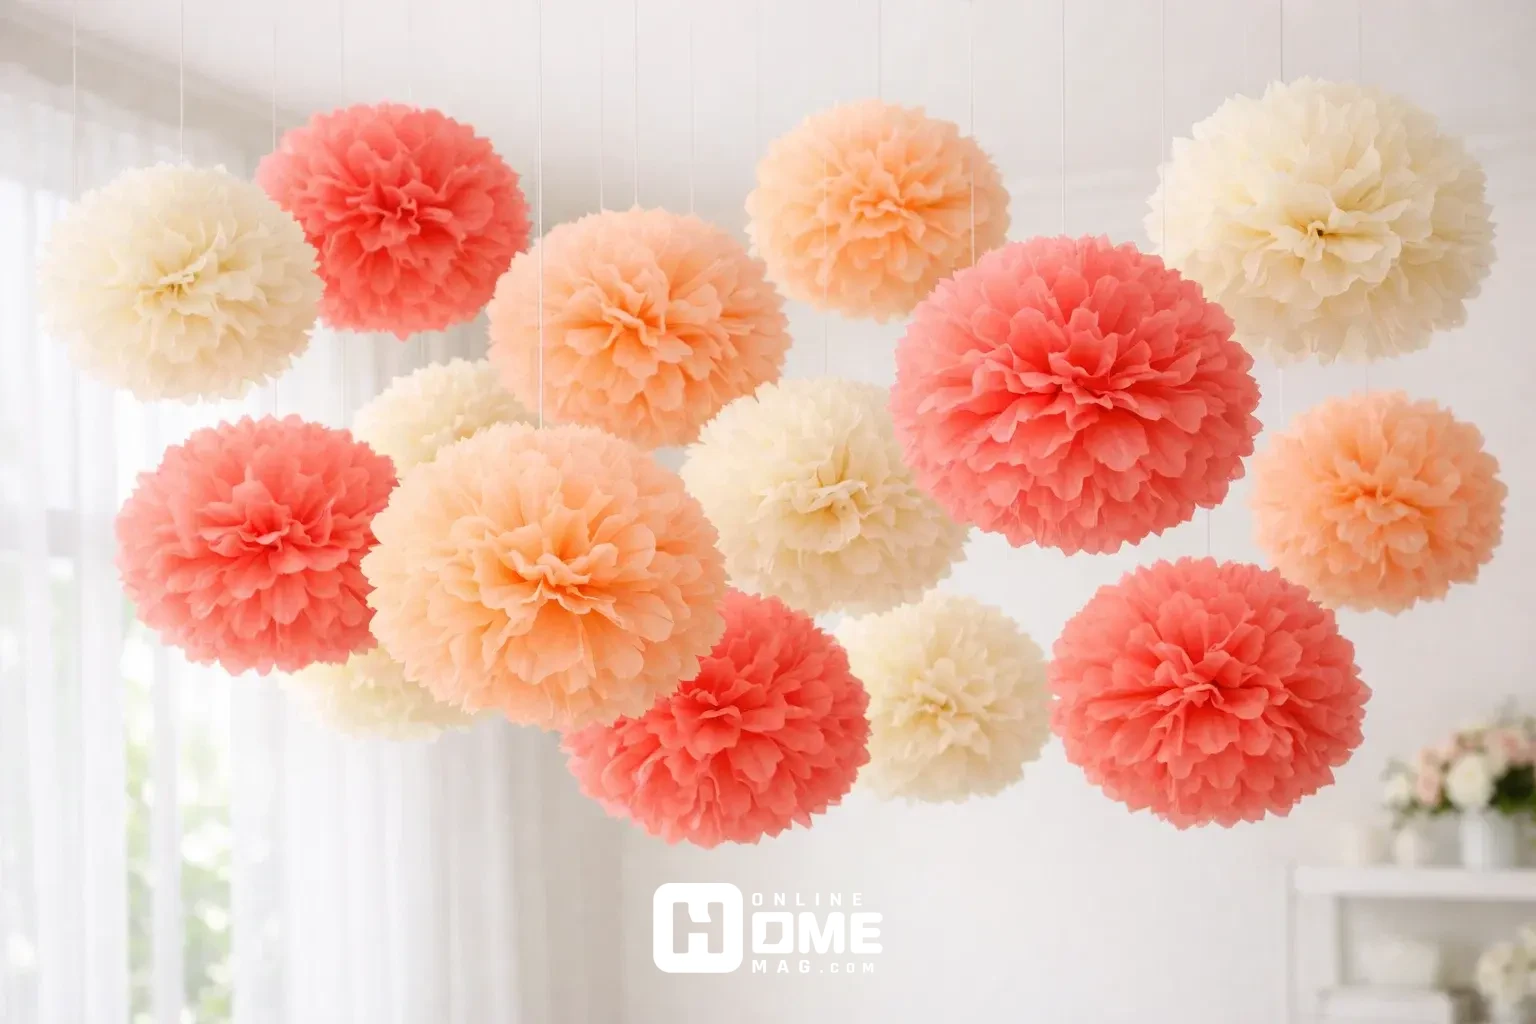
Tissue Paper Pom-Pom Chandelier
Create dimensional overhead decoration using tissue paper pom-poms suspended at various heights. You’ll need 10-12 sheets of tissue paper per pom-pom, thin wire, and fishing line for hanging. For each pom-pom, stack 8-10 sheets of tissue paper (20×30 inch standard size) and accordion-fold them into 1-inch pleats. Secure the center with thin wire, leaving long ends for attaching string. Cut rounded or pointed edges on both ends of the folded stack, then carefully separate and fluff each layer toward the center. Create pom-poms in three sizes: small (6-inch diameter using half sheets), medium (10-inch), and large (14-inch using full sheets).
Hang them from your ceiling using fishing line at staggered heights 18, 30, and 42 inches above your main party area. Mix colors within your theme or create an ombre effect from light to dark. This simple birthday decor ideas at home project takes 2-3 hours to make all pom-poms but costs only $15 and completely transforms your ceiling space with texture and color.
Drawing inspiration from seasonal approaches like Minimalist Christmas Table Decor, the key to successful pom-pom displays is restraint choose a cohesive color palette rather than rainbow chaos, and vary sizes for visual interest without overwhelming the space.
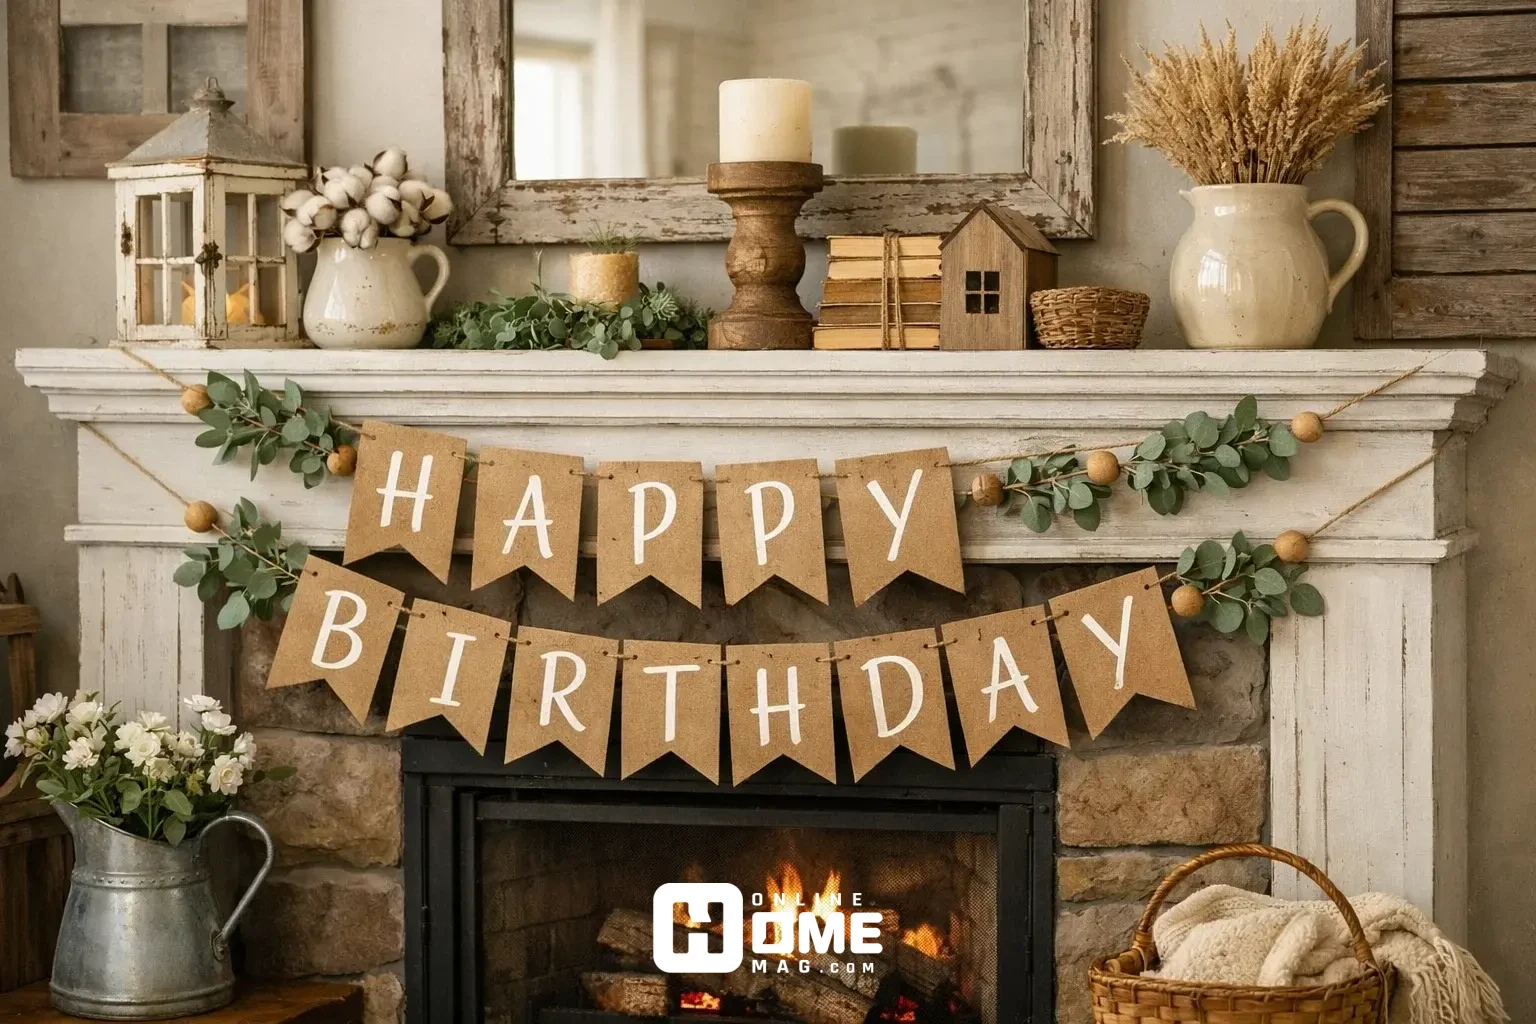
Personalized Banner with Natural Elements
Design a custom birthday banner that incorporates natural textures for a sophisticated, organic feel. Cut triangular pennants from kraft paper or cardstock (7 inches tall, 5 inches wide at the base), creating 12-15 pieces for a 6-8 foot banner. Hand-letter or print the birthday message, allowing 1-2 letters per pennant. Punch holes in upper corners and thread pennants onto jute twine or ribbon, spacing them 3-4 inches apart.
Between every 2-3 pennants, tie on small sprigs of eucalyptus, dried lavender, or seasonal greenery (each sprig approximately 4-6 inches long). Attach small wooden beads or bells for additional interest. Hang the completed banner across a mantel, doorway, or above the dessert table using removable hooks. This approach works wonderfully for intimate celebrations and echoes the thoughtful simplicity found in Valentine’s Day Decor for Small Apartments creating impact through intentional, quality touches rather than quantity. Material cost runs approximately $18, and assembly time is about 45 minutes.
Making Your Celebration Memorable
Implementing these simple birthday decor ideas at home proves that memorable celebrations don’t require professional decorators or enormous budgets. Each decoration technique we’ve explored focuses on accessibility, affordability, and visual impact, using materials readily available at craft stores or even within your own home. The beauty of DIY decorations lies in their customization you control colors, scale, and personal touches that reflect the birthday person’s unique style.
Remember that successful party decor follows a few fundamental principles: choose a cohesive color palette (2-3 main colors), create varying heights for visual interest, incorporate both ambient and task lighting, and designate clear focal points for photos. Start planning 1-2 weeks before the celebration, allowing time to gather materials and execute projects without stress. The most impactful decorations often come from thoughtful details rather than expensive purchases a carefully curated photo wall means more than generic store bought banners. Whether you implement one idea or combine several, your effort will create an atmosphere of celebration that makes the birthday person feel truly special and loved.