
🕓 Last updated: October 27, 2025
What Causes Mold on Refrigerator Seals?
Mold can grow on refrigerator seals due to several factors, primarily moisture and organic material. The rubber seals on your fridge door are designed to keep the cold air inside, but if they become wet or dirty, mold can quickly start to form. This can be a common issue in kitchens where humidity levels are high or where spills happen frequently.
High humidity in the kitchen or moisture from spills can lead to mold growth, especially if the fridge door is often opened, letting warm air in and causing condensation on the seals. Poor air circulation around the door seals encourages dampness, creating an ideal environment for mold to thrive. Additionally, leftover food particles or liquid spills can also contribute to the mold buildup. Food residue stuck on the seals, combined with moisture, creates the perfect breeding ground for mold.
To prevent mold from growing, it’s essential to regularly clean and dry the refrigerator seal. Not only does this help with hygiene, but it also ensures that your fridge maintains its energy efficiency by forming a proper seal. If mold has already started to form, it’s important to clean it thoroughly to avoid further contamination of food inside the fridge.
Tip: Always ensure the refrigerator door seals are clean and dry to avoid mold growth. How to clean refrigerator seals effectively involves wiping them down with a mixture of warm water and mild detergent, followed by drying them completely. Using a toothbrush or small brush to scrub into the grooves can help remove any hidden dirt or mold spores. Once clean, consider applying a thin layer of baking soda paste to prevent future buildup and keep the seals in good condition.
By regularly maintaining the seals, you not only ensure your fridge operates efficiently but also keep your kitchen free from unwanted mold and unpleasant odors.
How to Identify Mold on Refrigerator Seals
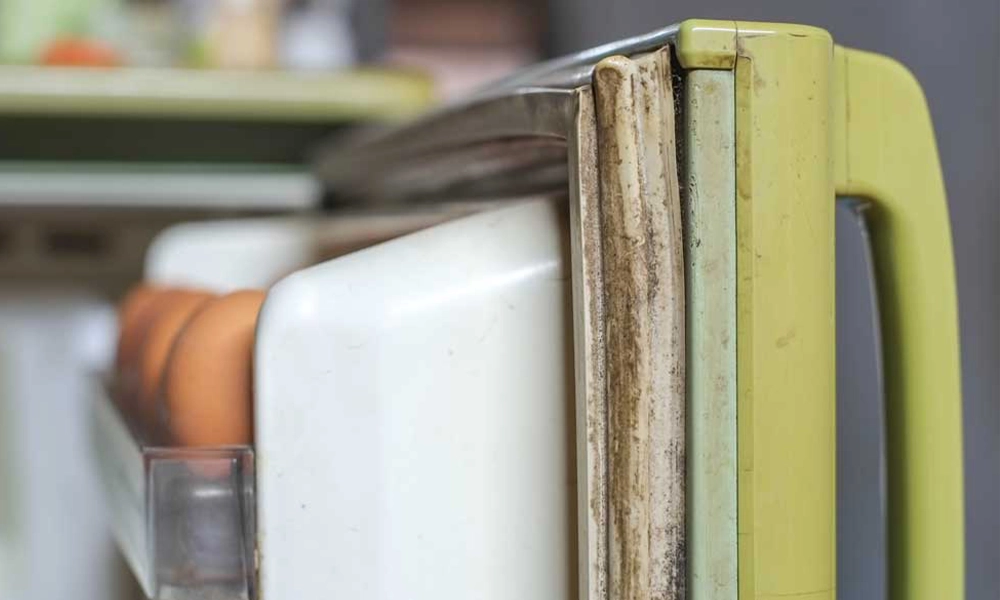
Identifying mold on refrigerator seals is easy if you know what to look for. Mold tends to thrive in damp, dark environments, which makes refrigerator seals an ideal place for it to grow. Here’s how you can identify it:
- Check the Door Edges: The seals along the refrigerator door are often the first place mold appears. Mold typically starts to grow in the cracks and folds of the rubber gasket that forms the seal.
- Look for Black, Green, or White Spots: These are the most common colors of mold that can grow on refrigerator seals. Black or green spots are especially common. White spots may appear as fuzzy patches or film.
- Check for a Slimy Film: In some cases, mold may not appear as spots but may instead show up as a slimy, discolored film on the seal.
- Smell: A musty odor is often a clear indication that mold is present. If you notice a strange or unpleasant smell when you open the fridge, it could be mold growing on the seals.
- Inspect for Dirt or Food Residue: If you see leftover food particles or spills near the seal, mold could be growing on or around them.
Tip: Inspect the refrigerator seal every few weeks to catch mold growth early. Regular inspection can help you identify any potential mold before it spreads and becomes a bigger problem. By staying vigilant, you can maintain a clean, mold-free fridge.
How to Prevent Mold on Fridge Door Seals
Preventing mold growth on your fridge door seals requires regular maintenance and attention to detail. Since refrigerator seals are exposed to moisture, spills, and food particles, mold can easily start to grow if they’re not cleaned and maintained properly. Here’s how to prevent mold from taking hold:
Regular Cleaning: One of the most effective ways to prevent mold is to clean the seals regularly. Use warm water and mild detergent to wipe down the seals, paying close attention to any creases or grooves. A small brush, like an old toothbrush, can help scrub out any dirt or debris that might accumulate in hard-to-reach areas.
Keep the Seals Dry: Moisture is the main contributor to mold growth, so it’s essential to keep the seals dry. After cleaning, make sure to dry the seals completely. If spills or water collect around the door area, wipe them up immediately to avoid moisture buildup.
Improve Ventilation: Good air circulation around the fridge can help prevent moisture from accumulating on the seals. If your kitchen is very humid, consider using a dehumidifier to maintain a dry environment.
Check the Door Seal’s Condition: Over time, seals can wear out and lose their effectiveness, leading to gaps where moisture can get trapped. Regularly inspect the seals for any cracks or tears and replace them if necessary to prevent mold and ensure your fridge stays efficient.
Avoid Food Spills: Prevent food from spilling onto the seals by keeping the fridge organized and ensuring that containers are sealed tightly.
By following these tips, you can effectively prevent mold growth on your fridge door seals and keep your refrigerator clean and functional for years to come.
How do i clean this rubber lining thing in a fridge?
Cleaning the rubber lining or seals of your fridge is essential to prevent mold growth, odors, and dirt buildup. Here’s a step-by-step guide to help you clean your fridge door seals effectively:
- Gather Your Supplies
You’ll need:
- Warm water
- Mild dish soap or baking soda
- A soft cloth or sponge
- A toothbrush (optional)
- White vinegar (optional for mold removal)
- A dry towel or cloth
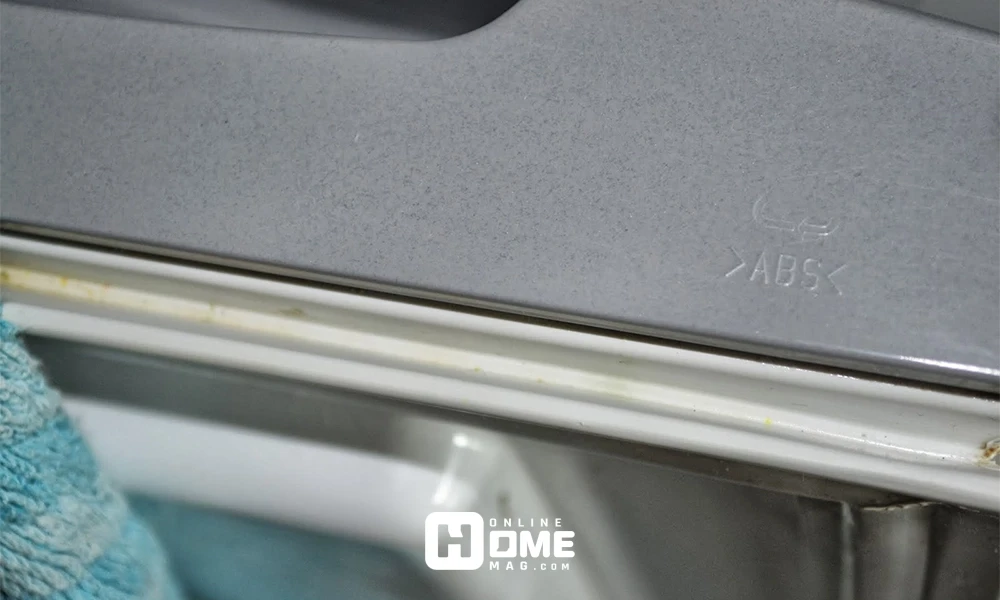
- Inspect the Seals
Before you begin cleaning, inspect the seals for any cracks, tears, or signs of mold. If you spot mold, use white vinegar or a vinegar-water solution to treat it.
- Clean with Soapy Water
- Mix warm water with a small amount of mild dish soap.
- Dampen a soft cloth or sponge with the soapy water and gently wipe down the rubber seals. Be sure to clean all parts, including the grooves where dirt and food particles can accumulate.
- Scrub Stubborn Areas
For any areas with tough dirt or mold, use a toothbrush to gently scrub the rubber lining, getting into the creases and corners. For moldy spots, you can use a solution of one part vinegar and one part water to help break down the mold.
- Rinse and Dry
Once you’ve cleaned the seals, dampen a clean cloth with plain water to wipe away any soap residue. Then, dry the seals thoroughly with a towel. Avoid leaving moisture behind, as it can contribute to mold growth.
- Apply a Protective Layer (Optional)
After cleaning, you can apply a small amount of petroleum jelly or vegetable oil to the rubber seals. This helps maintain the flexibility of the seals and prevents them from drying out or cracking.
By regularly cleaning the rubber lining of your fridge, you’ll not only keep it hygienic but also prolong the lifespan of the seals, ensuring your fridge works efficiently.
| Step Number | Action | Description |
| 1 | Gather Your Supplies | You will need warm water, mild dish soap, a soft cloth or sponge, a toothbrush, white vinegar (optional for mold removal), and a dry towel. |
| 2 | Inspect the Seals | Carefully inspect the seals for any cracks, tears, or mold. If you find mold, use a vinegar-water solution to clean it. |
| 3 | Clean with Soapy Water | Mix warm water with a small amount of mild dish soap, dampen a cloth or sponge, and wipe down the seals, especially in grooves where dirt may accumulate. |
| 4 | Scrub Stubborn Areas | Use a toothbrush to scrub stubborn dirt or mold spots. Apply a vinegar-water solution to moldy areas for extra cleaning power. |
| 5 | Rinse and Dry | Use a clean, damp cloth to wipe away any soap residue, then dry the seals thoroughly with a towel. |
| 6 | Apply a Protective Layer (Optional) | After cleaning, you can apply a small amount of petroleum jelly or vegetable oil to the seals to maintain flexibility and prevent cracking. |
Conclusion
Taking care of your fridge door seals is an essential part of maintaining a clean, energy-efficient, and functional refrigerator. These seals are the barriers that help keep cold air inside, and when they are dirty or damaged, they can cause your fridge to work harder, leading to increased energy consumption and potential food spoilage. Regular cleaning and inspection of the seals can prevent mold growth, eliminate unpleasant odors, and improve the overall efficiency of your appliance.
The process of cleaning is simple and doesn’t require much effort, but the benefits are significant. By following the steps we’ve outlined—such as cleaning with mild detergent, inspecting for mold, and drying the seals thoroughly—you can prolong the life of your refrigerator, ensure it works at its best, and maintain a hygienic kitchen environment.
Pro Tip: It’s a good idea to clean the fridge seals every few weeks and check them for any signs of wear and tear. If you notice cracks or significant damage, replacing the seals promptly can save you money in the long run.
Remember, a well-maintained fridge not only helps with energy efficiency but also ensures your food stays fresher for longer, contributing to a healthier lifestyle.
For more insightful home maintenance advice, make sure to check out Online Home Mag. We offer a wide range of tips and tricks for keeping your home in top shape!